The time has come to inject some political opining into Fried Sage. Getting into political discussions at the hair salon tends to get the juices flowing. Listening to NPR will do that, too ... especially with only 6 weeks to go.
On the "On Point" NPR show today, they were discussing some alarming findings about poverty and the middle class in America. A fellow with the Brookings Institute shared some of the findings from their research. They defined certain benchmarks as a measure of how well children in America are succeeding along the path to middleclassdom. The benchmark at age 19 is for a kid to: graduate from high school with a GPA of at least 2.5, not be convicted of a crime, and not become a parent.
Currently, 57% of American kids are meeting this benchmark. That means pretty close to half of all kids are either not graduating from high school or are doing so with very poor grades, have criminal records, and/or are having babies. One of the other experts on the show was comparing our rich-poor gap with countries like Rwanda.
Making the rich richer is not the answer. I'm talking to you, Republican party. Their candidate has made it perfectly clear that he cannot relate to the 99%, he has no desire to relate, and he doesn't even have the ability to pretend to relate.
I won't go down the ranting path any longer (for now). I really just wanted to share those disturbing findings. The discussion on the show began with a soundbite of Paul Ryan's speech at the RNC in which he claims that there are three basic keys to making it to the middle class: graduating from high school, working hard, and marrying before having children. The Brookings fellow agreed that doing those three things can help, but that is over-simplification at best. She said the biggest factor is whether you are born into a rich family or poor family, and of course no kid gets that choice.
Wednesday, September 26, 2012
Tuesday, September 18, 2012
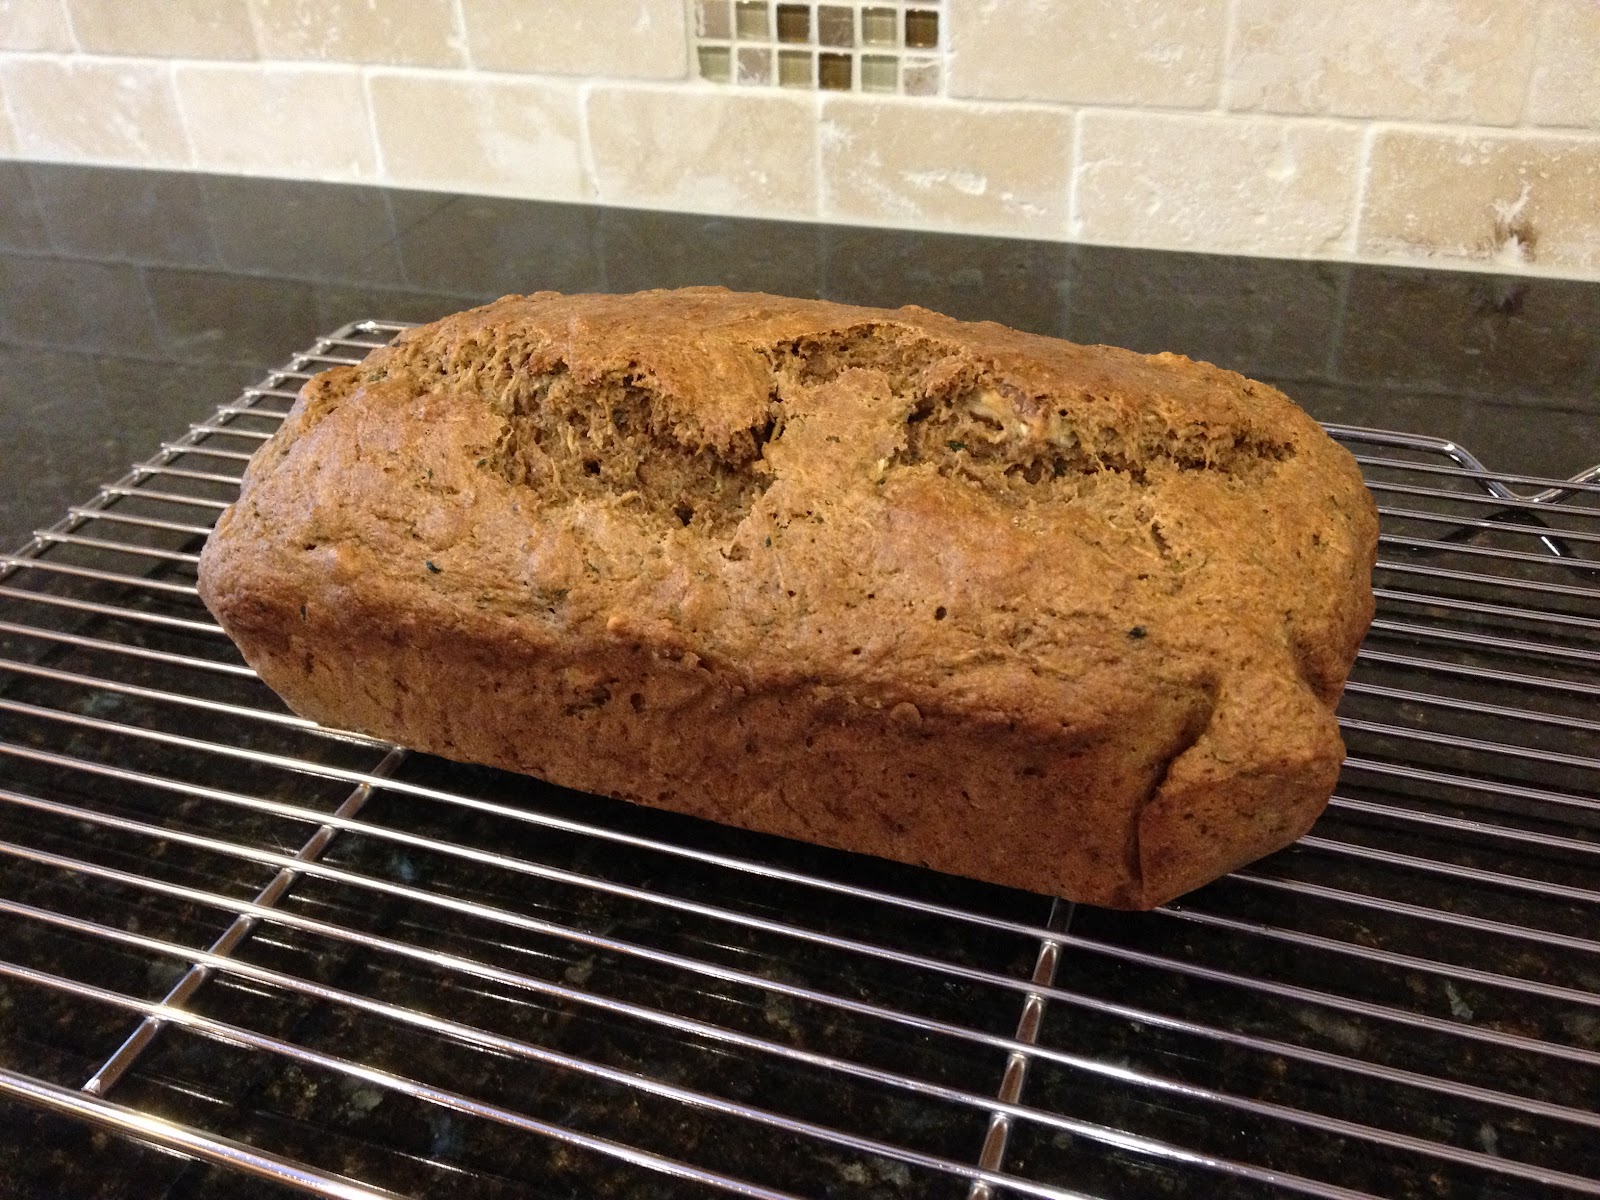
Banana Bread

This is a moist, sweet bread that isn't overpowered by the flavor of the bananas. I've taken Erin McKenna's gluten-free recipe and added the gluten back in by using spelt flour. I've yet to bake something with spelt flour and not get a moist, delicious end result. I can't understand why it's so underused in recipes.
For some reason this recipe was designed to have leftovers, using a smaller loaf pan. I used my larger 9-incher, filling it up half-way with the batter as directed, and made three muffins from the leftovers. But in the end there was enough room in the loaf pan for all of the batter, so next time I won't bother with the muffins.
The original recipe calls for 1 1/2 cups of mashed bananas. I used two smallish bananas, which -- when mashed -- looked to be less than that. So, if you like more of a banana-y flavor in your banana bread, just use more bananas than I did.
I also threw in a handful of chopped dates and about a cup of bittersweet chocolate chips. I think toasted walnuts (or some other nut) would be good as well.
I'm not sure what the sinking in the middle was all about.

Banana Bread
(adapted from Erin McKenna's Babycakes)
2 cups spelt flour
2 tsp baking powder
2 tsp baking soda
1 tsp salt
1 tsp ground cinnamon
1/2 cup extra virgin coconut oil, melted
2/3 cup agave
2/3 cup milk (I used 2% organic)*
1 tsp vanilla extract
2 mashed bananas
extras (I used a handful of chopped dates and a cup of bittersweet chips)
Preheat the oven to 325 degrees. Oil a loaf pan (I used coconut oil).
Combine the flour, baking powder, baking soda, salt, and cinnamon in a medium bowl, and whisk together. Add the coconut oil, agave, milk of choice, and vanilla, and stir until smooth. Fold in the bananas (and any extras, like chips) until evenly distributed.
Pour the batter into the prepared loaf pan and bake for 35 minutes, rotating the pan after 20 minutes. A toothpick should come out clean.
Let the bread cool in the pan for about 20 minutes. Then, after running a knife around the edge, cover with a cutting board or plate and invert it onto said board. Next, re-invert it onto another board or plate to get it right-side up.
Store the uncut loaf in plastic wrap at room temp for up to 3 days. (After that, I stored it for a few days in the refrigerator before transferring the remainder to the freezer.)
* I've neglected to mention it, but I hope it's a given that the type of milk used is up to the baker. Many of the recipes I use are adapted vegan recipes. I use regular (albeit, organic 2%) ol' cow's milk because I live with a carnivore and haven't had (made, is more like it) the opportunity to explore other types (rice, coconut, soy, almond). Also, even though I don't always specify organic, I try to use organic everything whenever possible (like the flour, for example).
Wednesday, September 12, 2012
Light Meals

Kes
(We lost Kes recently. She was 17 but still the queen of the household.)
(We lost Kes recently. She was 17 but still the queen of the household.)
Here's a small sampling of some light lunches/dinners put together from left-overs or whatever was still fresh in the frig. Some (or all) of it may not look appetizing to everyone; hopefully no one will be totally grossed out or anything. It was all good to me, weird or not. And it goes without saying that these were meals for one (since hubby would surely choose starvation over any of these offerings).
Roasted beets, roasted balsamic onions, and goat cheese on bibb lettuce, with microgreens, cherry tomatoes, cukes, and carrots. Just about everything came from the Matthews Farmer's Market. Like her dad, Kes would have turned her nose up at this one (except maybe for a few licks of the cheese).

Take a piece of smoked salmon with goat cheese (of course) on top of a leaf or two of bibb lettuce with some leftover ginger & garlic sauteed shrimp, microgreens and capers on the side, and ...

... plop a lightly fried egg (with more goat cheese) on top. I could eat this every day. Kes would have enjoyed the salmon (and licking the gooey egg off her whiskers).

A juicy slice of farmer's market tomato with roasted eggplant, green peppers, red onion on bibb lettuce with feta-style goat cheese and drizzle of reduced balsamic. Not one for Kes.

Whole wheat bread with caramelized garlic spread and pecorino cheese (on the right) and goat-cheese feta (on the left), microgreens, and goat-cheese stuffed squash blossoms. Kes might have liked the cheese on top, except that the garlic smell probably would have ruined it for her.

One more. The least photogenic for last. It's hard to tell, but was a black-bean burger covered in avocado and with dollops of a Greek yogurt/adobo sauce combo. Nothing for Kes. : (

Thursday, September 6, 2012
Lentils and Farro

This concoction was based on the Farro Soup recipe in Heidi Swanson's Super Natural Every Day. Hers is an actual soup, but I added less vegetable broth to mine to make it less soupy.
The lentils and farro are a good combination, and curry powder goes well with them. Heidi's recipe calls for cooking diced sweet potato or winter squash with the onion, but I just threw in some roasted summer squash (that I had pulled from the freezer) at the end.
This makes a nice, easy vegetarian dish.
Portions are all optional, depending on your likes and dislikes.
Ingredients
onions
lentils
farro
curry powder
low-sodium vegetable broth (or water)
cooked veggies to throw in (or uncooked veggies that can be sauteed with the onions)
Saute the chopped onions in extra virgin olive oil for a few minutes to soften. Stir in the curry powder (I used about a teaspoon or so), then add the lentils and farro* and vegetable broth**. Bring to a boil, then reduce the heat, cover, and simmer until the lentils and farro are done. Mix in the cooked veggies. Drizzle some olive oil on each portion when serving.
For a tangy, creamy accompaniment, thoroughly mix some course-ground or Dijon mustard into a dollop of Greek yogurt.
* Check the package directions for cooking the lentils and farro. I used pearled farro which doesn't take as long as the lentils to cook, so I added them about half-way into the lentils cooking time.
** The amount of broth depends on how soupy you want it.
Eating Blossoms

... as in squash/zucchini blossoms. What do they taste like? They're delicate and fresh-tasting, and serve mainly as a vessel for the cheese stuffing (in my opinion).
You can dredge them in flour and fry them in some olive oil. Lately I've been taking Melissa Clark's (New York Times) advice and skipping the cooking step. It's easier and tastes just as good.
Just pull out the stamen in the center of the flower. You may tear some of the petals doing this, but that's OK.

Then stuff it with some soft goat cheese (or other soft cheese, plus anything else that sounds good ... Melissa Clark adds a tapenade).

Twist the ends of the petals together to close, sprinkle some freshly ground pepper, and drizzle a little extra virgin olive oil.

And then bite the blossom off its stem.

Wednesday, August 29, 2012
Butternut Squash Soup

Butternut squash is so sweet and delicious, and a pain in the butt to peel and chop. So the option of making soup with it is a good one if you want to avoid the peeling and chopping. All you have to do is cut it in half, scoop out the seeds, roast it, scoop out the flesh, add it to broth (or just plain water), and puree it.
Then you can freeze single portions and thumb your nose as you pass the soup aisle in the grocery store. The freezer is the only preservative needed here.
Step 1 - Cut the squash in half, scoop out the seeds, rub olive oil on the exposed flesh and sprinkle on some salt and pepper, and place cut-side down on a sheet pan and roast in a 375-degree oven for about 30-50 minutes (depends on size) until the flesh is soft. Put the squash aside to let it cool off a bit.
Out of the oven, cooling off:

Step 2 - Add some low-sodium vegetable broth (or just water) to a large saucepan. The amount is personal preference (I used about 1/2 quart). Scoop out the flesh of the squash and add it to the broth. Add 1/2 - 1 tsp curry powder (again, personal preference) and simmer for about 10 minutes.
Broth and scooped-out squash on the stove (not quite simmering yet):

Step 3 - Now it's ready to be pureed, however you're equipped to do so (blender, hand-blender, etc.). I use a hand-blender, so I don't have to let it cool off. Puree to your preferred consistency (I like it pretty thick), adding salt and pepper (to taste).
Another ingredient I like to add is goat cheese. It adds a little creaminess and slight tang. For this batch, I didn't have the usual plain soft goat cheese so I crumbled in a feta-style goat cheese that I had. The cheese isn't necessary, nor is heavy cream that a lot of recipes call for.
Blending in a little goat cheese:

Es todo (that's all):

Friday, August 24, 2012
Coconut Oil Brownies (Brownies without the Soy)

My friend (you know who you are :) ) and I have been commiserating about how soy is in EVERYTHING. Even our beloved chocolate bars. Soy lecithin is added to keep the cocoa butter and cocoa from separating (i.e., an emulsifier). We -- my friend and I -- agree that too much soy is something to avoid, for many reasons.
So I've been trying to decrease (eliminate, if possible) the soy from the chocolate desserts I make. Since I love the coconut oil/cocoa powder combination in the Homemade Chocolate Bars recipe, I wanted to make brownies using that combination instead of using a bittersweet chocolate bar (with its soy lecithin). (My friend and I also believe in the health benefits of coconut oil.)
My first attempt wasn't entirely successful. This is why I still consider myself a beginner when it comes to cooking. I equate where I am with the "branching" phase that eaglets go through when learning how to fly. First they flap their wings (avid eagle watchers call it wingersizing) while standing around in the nest. Then they hover over the nest for brief periods. The next step is branching, when they take short flights to a nearby branch then return to the nest again.
The first brownie batch was based on my best estimate of ingredient proportions. It turned out thin and very dry. Not to worry about wasting food here ... a topping of pistachio gelato saved the day. It was passable only with the added gelato.
I did more research and discovered the tweaks I needed to make. And this is the recipe I'm sticking with for the foreseeable future for brownies, because it's so good! It got the rare "check mark, plus, plus" hand notation on my working copy.
Ingredient notes:
- About the bittersweet chips. I thought I may have found some soy-free chips, however it's never that simple, is it? There is not a single soy ingredient listed on the package. But when I ventured onto their website to find out what ingredient is used as the emulsifier, it states that soy lecithin is used in their products ... but it's not clear if the chips are one of those products specifically mentioned. I haven't received a reply to my inquiry (and don't expect to). I think these would still be delicious without the chips, if you wanted to avoid the soy possibilities altogether.
- I used slightly less than 1 cup total sugar. I'd be curious to find out if using all brown or all white makes a noticeable difference.
Coconut Oil Brownies
(adapted from HomeEcatHome.com)
1/2 cup unsweetened cocoa powder
1/2 cup extra virgin coconut oil, melted
1/2 cup light brown sugar
1/2 cup natural cane sugar
1 tsp espresso powder
2 tsp vanilla extract
1/4 tsp salt
2 large eggs
1/2 cup all-purpose flour
1/2 cup bittersweet chips
Preheat the oven to 350 degrees. Grease an 8-inch square pan (I used coconut oil).
Sift the cocoa powder into a medium bowl, then add the coconut oil and stir until completely smooth. Add the sugar and mix well. Stir in the espresso powder, vanilla, and salt, then add the eggs. Add the flour and mix until just combined. Lastly, fold in the chips.
Gently spread the mixture into the prepared pan and bake for 20-25 minutes.*
* I baked them for 22 minutes, with a toothpick coming out clean ... and they were not dry at all (they weren't gooey, but they were moist enough). Next time I may try a bit shorter time, more like 20 minutes, just to experiment.
Tuesday, August 21, 2012
Whole Wheat Beer Bread

No messing with yeast, no waiting for rising, simple ingredients, and it has enough flavor to stand on its own. The most time-consuming part of making this bread is getting the additives ready -- chopping the herbs and garlic, grating the cheese -- which is all optional, in ingredient choice and amounts.
For the beer I used a black mocha stout because that's what I had in the frig (and I like stout). But a stout beer isn't necessary; use your favorite beer. For the cheese I used Pecorino. I tend to switch back and forth between Parmesan and Pecorino for the hard cheese to keep on hand, but I think I like Pecorino a little better. It's more flavorful ... a little nuttier and sharper.
The original recipe called for white flour, with an optional replacement of 1 cup with whole wheat flour. To me, a beer bread screams for whole wheat flour, not white. Why use ultra-refined white flour when a more nutrient-rich (i.e., healthier), flavorful whole wheat flour will do nicely?
Next time I think I'll add more herbs (just more of the same) and maybe leave out the cheese. Speaking of cheese, I'm thinking I should have stored the loaf in the refrigerator due to the cheese ingredient. I think I messed up on that account. I'd really like to get that assumption verified ... anyone? Thanks in advance!


Whole Wheat Beer Bread
(adapted from a www.food52.com recipe by joninnye)
1 cup spelt flour
1 cup whole wheat flour
1 cup white whole wheat flour
3 tsp baking powder
1 tsp salt
3 garlic cloves, chopped (more or less, depending on how much you like garlic)
1/2 cup grated Pecorino cheese (amount and type optional)
1-2 tbsp fresh rosemary and thyme, chopped (amount and herbs optional)
1 12-ounce beer
3-4 tbsp unsalted butter, melted
Preheat the oven to 375 degrees. Butter/oil a loaf pan.
Combine the flour, baking powder, salt, garlic, cheese, and herbs in a large bowl, and lightly mix together. Carefully pour in the beer and let the mixture sit for a few minutes. Stir until the beer has been absorbed throughout (the dough will be thick).
Pour the dough into the prepared loaf pan and gently spread it evenly. Pour the melted butter on top of the dough. Bake for 50-55 minutes, until the top is golden and the loaf is firm to the touch.
Thursday, August 16, 2012
Chewy Snack Loaf

Chewy Snack Loaf is not the original name of this "cake" -- it's actually
Tu bi'Shvat Cake, adapted by David Lebovitz from The Book of New Israeli Food by Janna Gur. I adapted it a step further and can't bring myself to call it a cake. It definitely makes a great mid-morning or mid-afternoon snack.
I used white whole wheat flour instead of all-purpose, used brown sugar instead of white (and a little less of it since the dried fruit adds enough sweetness), and chose dates, apricots, and cranberries for the dried fruit and walnuts, hazelnuts, slivered almonds, and a few pecans for the nuts.
Although David Lebovitz says in his blog that even he was skeptical about the extra long baking time (90 minutes!) but determined it was the correct time, I think I'll try a little bit shorter time when I make this again. For me, it seemed a bit too well-done ... but just on the very outside "crust"; the inner part tastes just right.
I'd love to hear how it turns out for others.


Chewy Snack Loaf
(adapted from David Lebovitz)
(adapted from David Lebovitz)
7 tbsp white whole wheat flour
5 tbsp brown sugar
3 large eggs
1/2 tsp ground cinnamon
1/4 tsp ground nutmeg
1/8 tsp ground cardamom
1/8 tsp ground cloves
1/8 tsp salt
1 1/2 cups dried fruit, chopped*
1 1/2 cups nuts, chopped and lightly toasted**
Preheat the oven to 300 degrees. Line a loaf pan with parchment paper.
Combine the flour, sugar, spices, and salt in a large bowl. Mix in the eggs, then the dried fruit and nuts.
Pour the mixture into the prepared loaf pan. Bake for 90 minutes.***
Let cool in the pan, then move to a cutting board and use a sharp knife to cut into 1/4-inch thick slices. It should keep for at least a week (wrapped or in an airtight container) at room temperature.
Notes:
*Use any combination of dried fruit, such as cherries, cranberries, raisins, figs, apricots, etc. (I used dates, apricots, and cranberries)
**Use any combination of nuts (I used walnuts, hazelnuts, slivered almonds, and pecans)
***The original recipe calls for 90 minutes baking time. That proved a bit over-done on the outside crust for my loaf. I would suggest keeping an eye on the baking time.
Friday, August 3, 2012
Chocolate Mini's

The name needs some work, but it's basically a donut recipe made into mini cupcakes. This is not your typical donut-like cake. What makes a donut a donut (I asked myself)? It's sweetened flour dough that is usually deep-fried (an Internet search responds). Then the only thing donutty about these is the sweetened part, and barely that since they aren't sickeningly, overly sweet like typical donuts.
This really was a trial run. I didn't want to invest in another specialty pan if this wasn't going to work out. (And, do I really want to get into making donuts ... even if they're a healthier, baked kind?) I waited to see what the dough consistency was like before choosing a pan to use. I was hoping to go the donut-hole route, dropping balls of dough on a sheet pan. But the dough wasn't stiff enough to hold the ball shape. So, the mini-muffin pan was the next choice.
These turned out better than I expected, and definitely worth another go, or two or three. There may be a donut pan in my future.
A gooey, chocolaty batter:

The usual small-batch (16 mini-muffin cups worth):

After cooling off, the minis get dipped in a little chocolate for a shiny finish:

The recipe used here was adapted from the Chocolate Cake Donut recipe in Erin McKenna's Babycakes Covers the Classics. I substituted spelt flour for the original recipe's rice flour and garbanzo & fava bean flour. And, as I usually do (especially when experimenting), I halved the normal amounts to make a small batch (hence the odd measurements).
Chocolate Cake Donut
(adapted from Erin McKenna's Babycakes Covers the Classics)
(adapted from Erin McKenna's Babycakes Covers the Classics)
1/4 cup + 1/3 cup + 1 tbsp spelt flour
1/2 cup + 1/6 cup natural cane sugar
1/4 cup unsweetened cocoa powder
1/2 tsp + 1/4 tsp baking powder
1/16 tsp baking soda
1/4 tsp salt
1/4 cup unsweetened applesauce
1/6 cup extra virgin coconut oil, melted
2 tbsp vanilla extract
Preheat the oven to 325 degrees. Oil a mini-muffin pan with coconut oil.
Mix together the flour, sugar, cocoa powder, baking powder, baking soda, and salt in a medium bowl. Add the applesauce, coconut oil, and vanilla and stir just until combined. Divide the mixture into the oiled pan (about a heaping tablespoon per cup, for a total of 16 cups).
Bake for about 15-16 minutes, rotating the pan at the half-way point. Let cool in the pan for about 15 minutes, then move to a sheet pan to prepare for topping.
Chocolate Glaze
Break up or chop about 2-3 ounces of a dark chocolate bar and melt in microwave oven: first, microwave for about 30-40 seconds, then let rest for about 4 minutes, then microwave again for another 20-30 seconds. Stir, and add about 1/2 tbsp - 1 tbsp unsalted butter (or other desired amount, OR use coconut oil) and stir to melt and combine completely. Stir in a pinch of salt.
Dip the tops of the minis into the chocolate.
Note: Some of my minis had deflated centers, so I spooned some extra chocolate onto the tops.
Thursday, July 26, 2012
Nut & Seed Biscotti

This is my favorite biscotti to make. Heidi Swanson, you're a genius. Few ingredients, few steps, a beautiful batter. About the "beautiful batter" comment. I need to explain that I was an anti-cook for most of my life. I did little of it because I didn't enjoy it. My mother never taught me how to cook (probably because she herself did not enjoy it). But it's just as well because the things I cook now and the things she cooked couldn't be further apart on the spectrum.
One of my initial eureka moments in cooking came while mixing the batter for this biscotti. This is going to be hard to explain. The batter is very simple, with nuts and seeds making up the majority of it. It looks good enough to eat raw, and it just somehow struck me that this was a beautiful creation.
I think part of it is the end result ... the eating part. It's not just that it's beautiful sitting there in the bowl in raw form, but also knowing that you're going to relish tasting and consuming it as well. And that the ingredients are healthy and therefore satifying. The worse part of this process is ... the cleanup! Thud. Back to earth.
Seriously, this is the best snack food ever. And simple to make.
First, toast the seeds and nuts:

Then mix the dry and wet ingredients separately:

Add the nuts & seeds to the dry batter. For this batch, I also threw in some dried fruit (apricots):

Add the dry into the wet:

Now plop it into the loaf pan:

And smoosh it down with wet fingers:

After it bakes the first time, slice it up:

And lay the slices on a sheet pan and brush with olive oil, bake a few minutes on one side (then you'll turn them over, brush the new sides with oil and bake again):

Nut & Seed Biscotti
(from Heidi Swanson's 101cookbooks blog, slightly adapted)
1 1/3 cups white whole wheat flour
2 cups mixed nuts and seeds, lightly toasted*
1/2 tsp salt
2 large eggs
2/3 cup natural cane sugar (I use a tad less than this)
extra-virgin olive oil, for brushing slices
First, lightly toast the nuts and seeds on a baking sheet in a 350-degree oven (should take 5-8 minutes). Set aside to cool a bit.
Preheat oven to 300 degrees. Line a loaf pan with parchment paper.
Combine the flour, nuts and seeds, and salt in a medium bowl. In a separate large bowl, whisk together the eggs and sugar. Add the flour mixture to the egg mixture and stir until combined (this takes some elbow grease). Dump the mixture into the prepared loaf pan. Using wet fingers press the dough into place, making sure it's nice and compact (no air bubbles) and level on top.
Bake for about 45 minutes, or until a toothpick comes out clean. Increase the oven temp to 425 degrees after removing the loaf.
Remove the loaf from the pan/parchment paper and put it on a cutting board. Using a thin, sharp serrated knife, slice the loaf into 1/4-inch thick slices (should create about 20 or so slices). Place the slices on a baking sheet (the same one used to toast nuts/seeds will work fine) and brush the top sides lightly with the olive oil. Bake in the 425-degree oven for about 3-4 minutes. Take the sheet out of the oven, flip over the slices, and brush the other sides with the olive oil. Bake for another 4 minutes.
*I like to use 3/4 cup chopped hazelnuts, 1/4 cup chopped cashews, 1/3 cup almond slivers, 1/3 cup sunflower seeds, and 1/3 cup pumpkin seeds.
For the photos above, I used what I had left of my supplies which was: 1/4 cup chopped hazelnuts, 1/8 cup almond slivers + chopped cashews, 1/8 cup pumpkin seeds, 1/3 cup sunflower seeds, 1/3 cup chopped pecans, 1/2 cup chopped walnuts, and 1/3 chopped dried apricots.
Tuesday, July 24, 2012
Spiced Zucchini Nut Bread
What do you do with a foot-long zucchini (I wish I had taken a photo!)? Well, I shredded every bit of it and used it to make muffins and bread. The nice thing about a zucchini that large (especially diameter-wise) is that it's easy to maintain a good grip for the job of shredding.
I was torn between making a more-on-the-sweeter-side cake with cocoa powder and chips or making a bread, sans chocolate but spiced up. Maybe I'll go the cake route another day. Another day, another zucchini ...
The bread batter ... doesn't look like much here in the bowl:

It's a wet, gooey batter ... easy to work with:

And turns out nicely in the end:

Note: Lots of variations are possible with this bread, including different flours, spices, sweeteners (honey, agave, etc.), fats (olive oil, butter, etc.), nuts, and more.
Spiced Zucchini Nut Bread
1 cup spelt flour
1/2 cup whole wheat pastry flour
1/2 cup white whole wheat flour
1 tsp baking soda
1/2 tsp salt
1 1/2 tsp cinnamon
1 tsp ground ginger
1/2 tsp nutmeg
1/4 tsp allspice
1/4 tsp ground cloves
3 medium (or 2 large) eggs
1/2 cup brown sugar
1/4 cup extra virgin coconut oil, melted (or olive oil)
1/4 cup nonfat Greek yogurt
1 tsp vanilla extract
2 cups finely shredded zucchini
1/2 cup walnuts & pecans, chopped and lightly toasted
First, lightly toast the nuts in a 350-degree oven. Takes about 5 minutes or so.
Line a loaf pan with parchment paper. Keep the oven on at 350 degrees.
Mix together the flours, baking soda, salt, and spices in a medium bowl.
Whisk the eggs and sugar in a large bowl. Add the oil, yogurt, and vanilla. Then add the zucchini and nuts. (I found it much easier to incorporate the zucchini at this stage, to the wet batter, instead of in the last step.)
Add the flour mixture to the wet batter, stirring well just until incorporated.
Pour/spoon the mixture into the lined loaf pan and spread it out evenly. Bake for 40-45 minutes, until a toothpick comes out clean. (Mine took 43 minutes.) Cool in the pan for about 15 minutes, then finish cooling on a rack.
Zucchini Muffins
I used the Zucchini Muffins recipe that's in Erin McKenna's Babycakes book, the same book from which I adapted my Spelt Blueberry Muffins post. It's similar to the blueberry muffins, using spelt flour, coconut oil, and agave. But it incorporates the shredded zucchini and some spices.

OK, that's enough zucchini for one day! Time for some chocolate ...
Friday, July 20, 2012
What's an Oatcake?

It's a dense, oaty, hearty, not-too-sweet, but very tasty and satisfying muffin-like (only in its shape) little cake. They make a great mid-morning or mid-afternoon snack. And the maple syrup gives them a delicious flavor.
I make them on the smallish side since they're so dense and anything larger would be too much in one serving.
Next time I make these I'm going to try it with coconut oil only and leave out the butter ... just to see if it makes much of a difference taste-wise. Pecans, or a mix of pecans and walnuts, are also good in these. The original recipe calls for spelt flour or whole wheat pastry flour. I've made them with half spelt and half whole wheat pastry flour, which worked fine also.
The original recipe also calls for flax seeds instead of the flax seed meal I use. It's simply personal preference -- I prefer the meal consistency over tiny seeds that get stuck in my teeth!
The dry mixture:

The wet mixture ... melting coconut oil, butter, maple syrup, and sugar together:

Mixing wet with dry:

And you get oatcakes!

Oatcakes
(ever-so-slightly adapted from Heidi Swanson's Super Natural Every Day)
Note: Some of the measurements may seem a bit odd; that's because I halved the original recipe to make 12 small oatcakes.
1 1/2 cups rolled oats
1 cup spelt flour
1/4 tsp baking powder
1 tsp salt
2 tbsp flax seed meal
1/3 cup (generous, rounded 1/3 cup) chopped walnuts, lightly toasted
3 tbsp extra virgin coconut oil
3 tbsp unsalted butter
3/8 cup maple syrup (or estimate 1/2 of 3/4 cup)
1/4 cup natural cane sugar
1 large egg, lightly beaten
First, lightly toast the walnuts (or other nuts) in a 350-degree oven (will take 5 minutes or so).
Preheat oven to 325 degrees. Oil a standard 12-cup muffin pan (with coconut oil or butter).
Mix together the oats, flour, baking powder, salt, flax seed meal, and nuts in a medium bowl.
Melt together the coconut oil, butter, maple syrup, and sugar over low heat on the stovetop in a medium saucepan. Stir until the butter melts and the sugar has dissolved, not letting the mixture get too hot.
Pour the coconut oil mixture over the oat mixture and mix. Then add the lightly beaten egg and stir until well combined. Divide the mixture into the oiled muffin pan.
Bake for 25 to 30 minutes (my oven takes 27 minutes), until the edges are deeply golden. Let cool in the pan for a few minutes, then run a knife around the edges and lift out onto a cooling rack.
Subscribe to:
Comments (Atom)